
Depositor Journey
High level process flow from the point of view of a Depositor
Prerequisites:
Before depositing into the dedicated smart contract, please:
- review the Access Controls documentation. Access Controls prevent unauthorized parties from operating and transacting with your dedicated smart contract.
- Ensure that you have been onboarded to the validator marketplace. If that has not been done yet, check our Onboarding guide.
1. Depositing into the dedicated smart contract
To get started, wallets that are assigned the Depositor Role deposit ETH into the dedicated smart contract. The smart contract will automatically emit a deposit event and create an Ethereum validator on the Beacon Chain.

Once the deposit is submitted, a pending transaction will become available for signature in your wallet.
Remember to deposit in increments of 32 ETH to maximize the capital efficiency of your stake.

Once the validator(s) becomes active, depositors consensus, execution and MEV rewards are collected within the contract and made available to depositors.
2. Claiming validator rewards
To claim staking rewards:
- If the reward recipient address has not been set yet or the current reward recipient address has to be changed, set the reward recipient address via the function setRewardRecipient(). Only Depositors and Default Admin can set the reward recipient wallet (to learn more about roles, check out: Access Controls).
- Collect rewards by calling the method collectRewards(). The staking contract will transfer all rewards available in the contract to the reward recipient wallet.
Anyone can call the function, but the rewards will always be transferred to the reward recipient address
3. Creating a Request For Quote
Users can submit a Request-For-Quote (RFQ) for a set of validators. Validators are sold in full and quotes in response to RFQ are All-or-None (AoN). When selling a large number of validators, we recommend submitting multiple quotes if possible. In addition, Northstake provides estimates of the next full withdrawal for each validator and we recommend to sell those validators whose next full withdrawal is closest to the time the RFQ is submitted. See [Submitting an RFQ to Validator Marketplace]
Before initiating validator sales, make sure to have subscribed to all the necessary webhooks
To subscribe to webhooks, go to the Webhooks tab in the UI
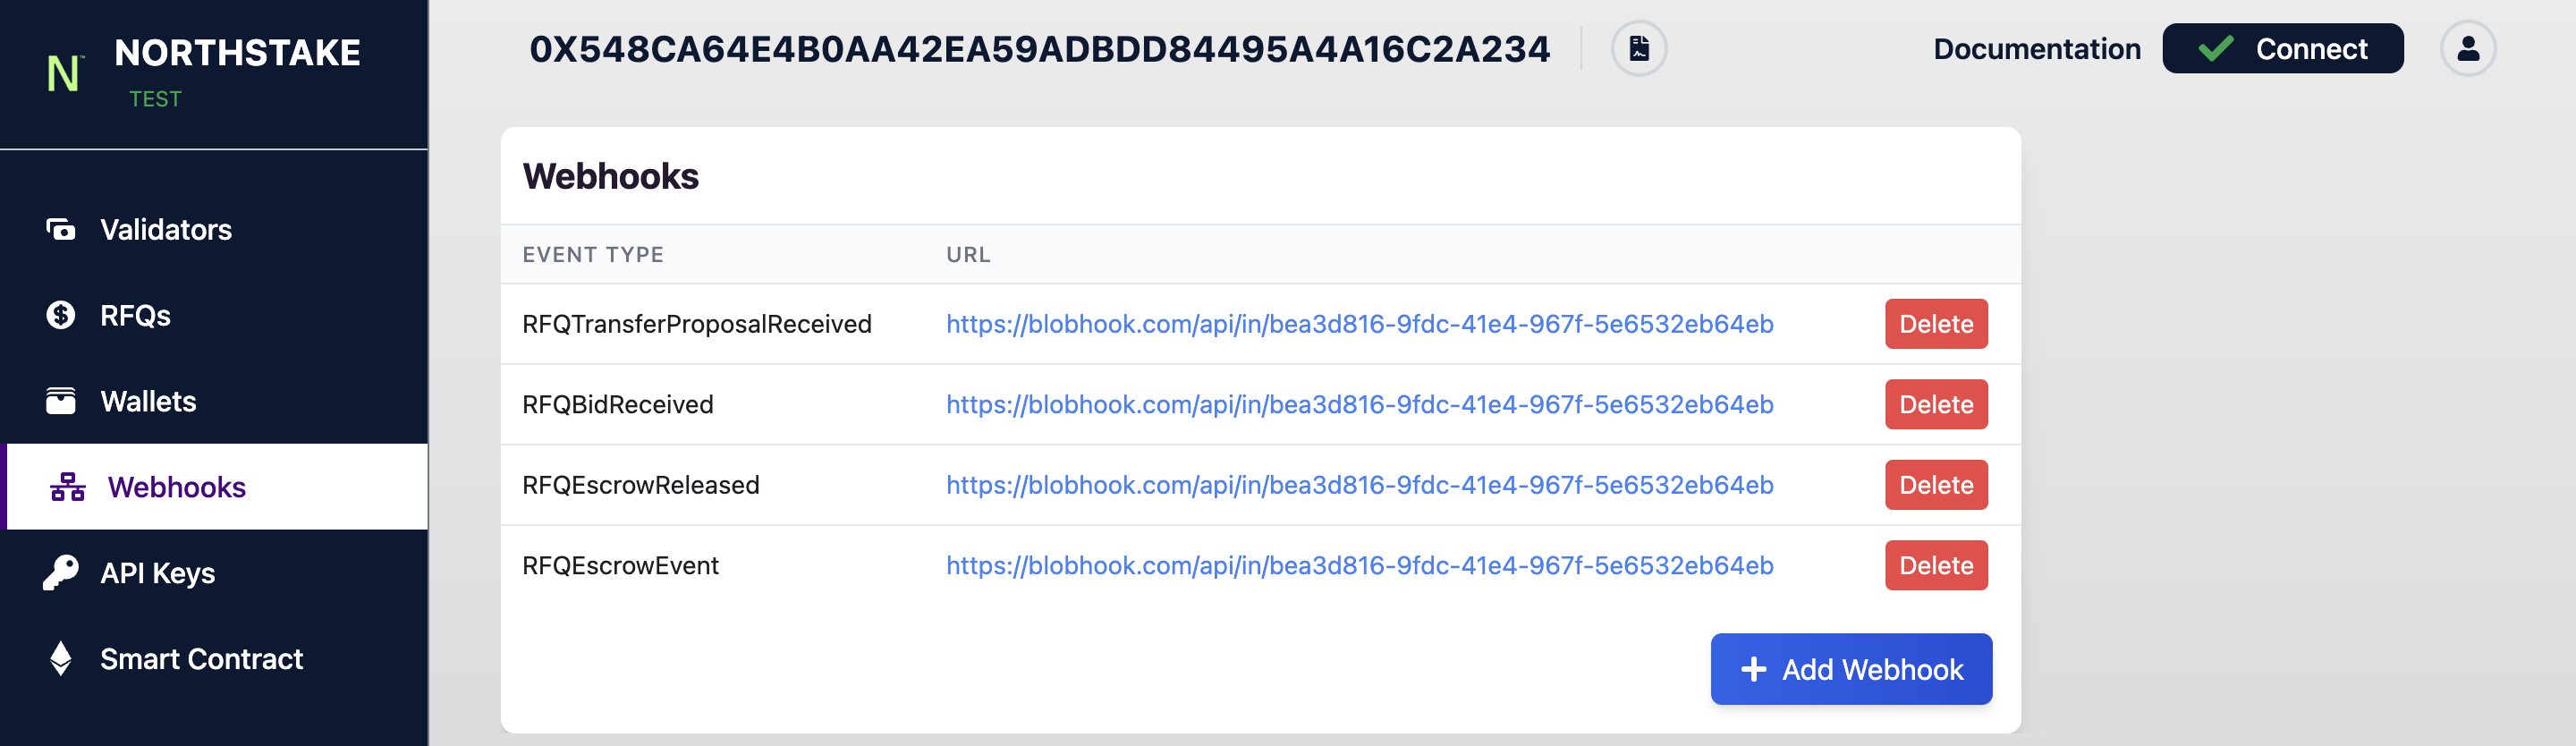
Click on Add Webhook and register all events by checking the boxes. The default URL is set to blobhook but can be changed based on preference.

Once webhooks are registered you can now submit an RFQ
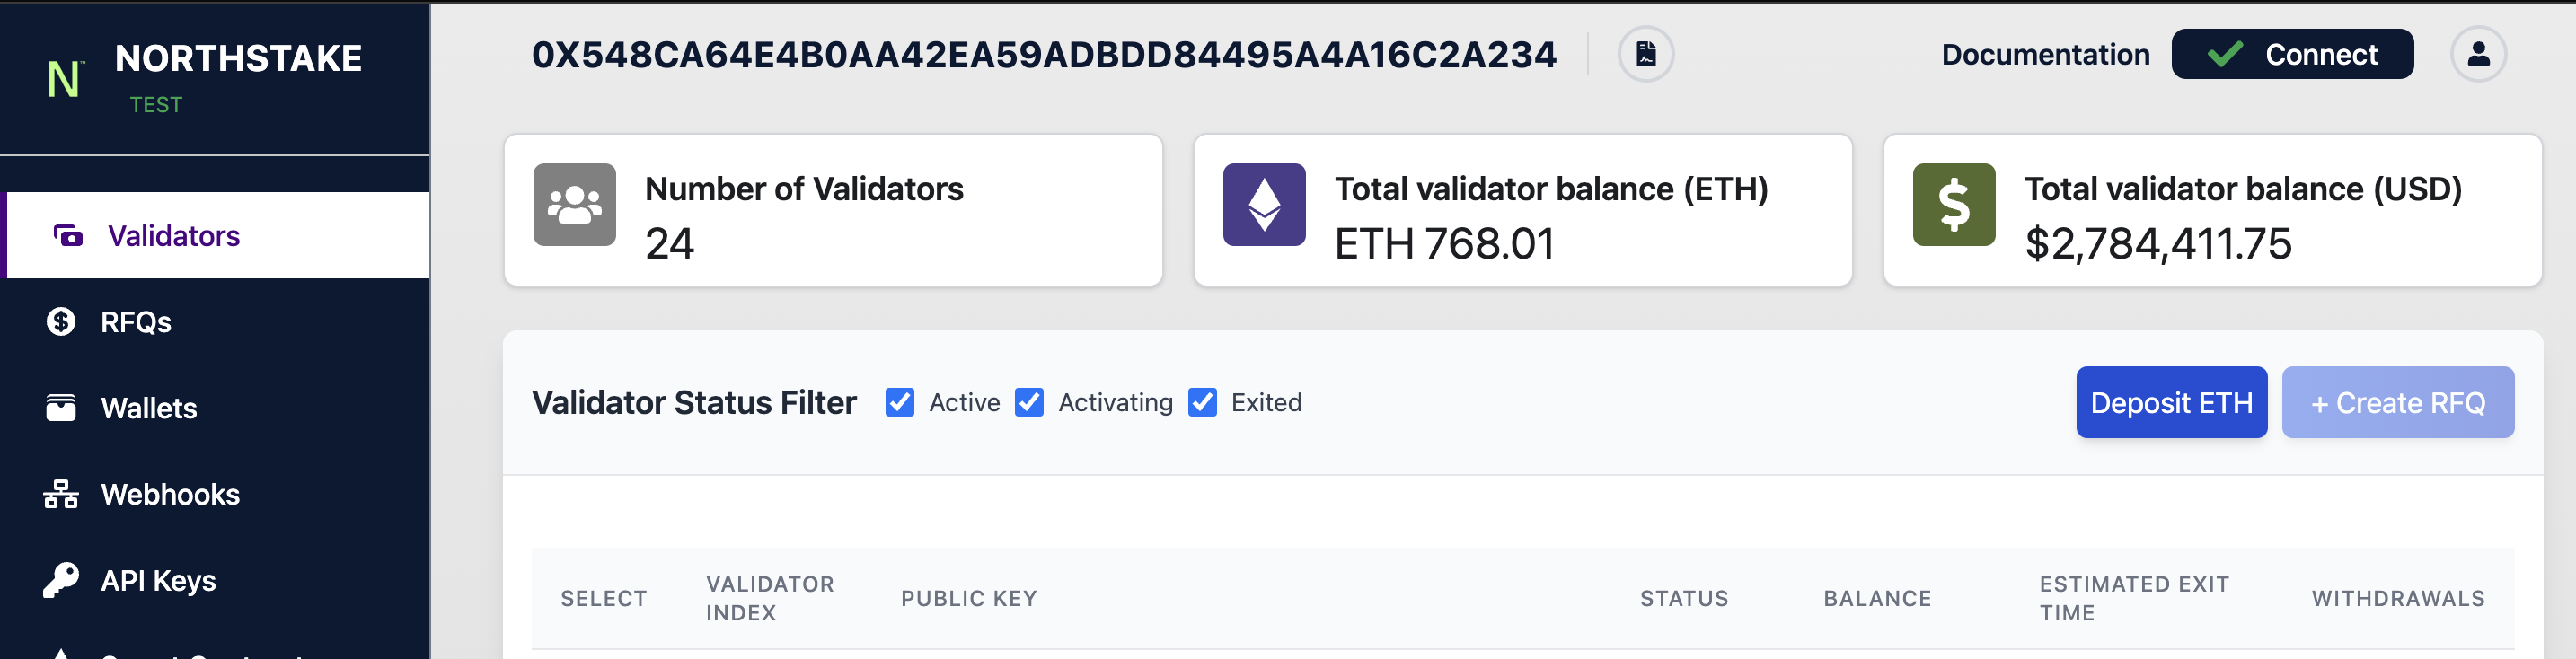
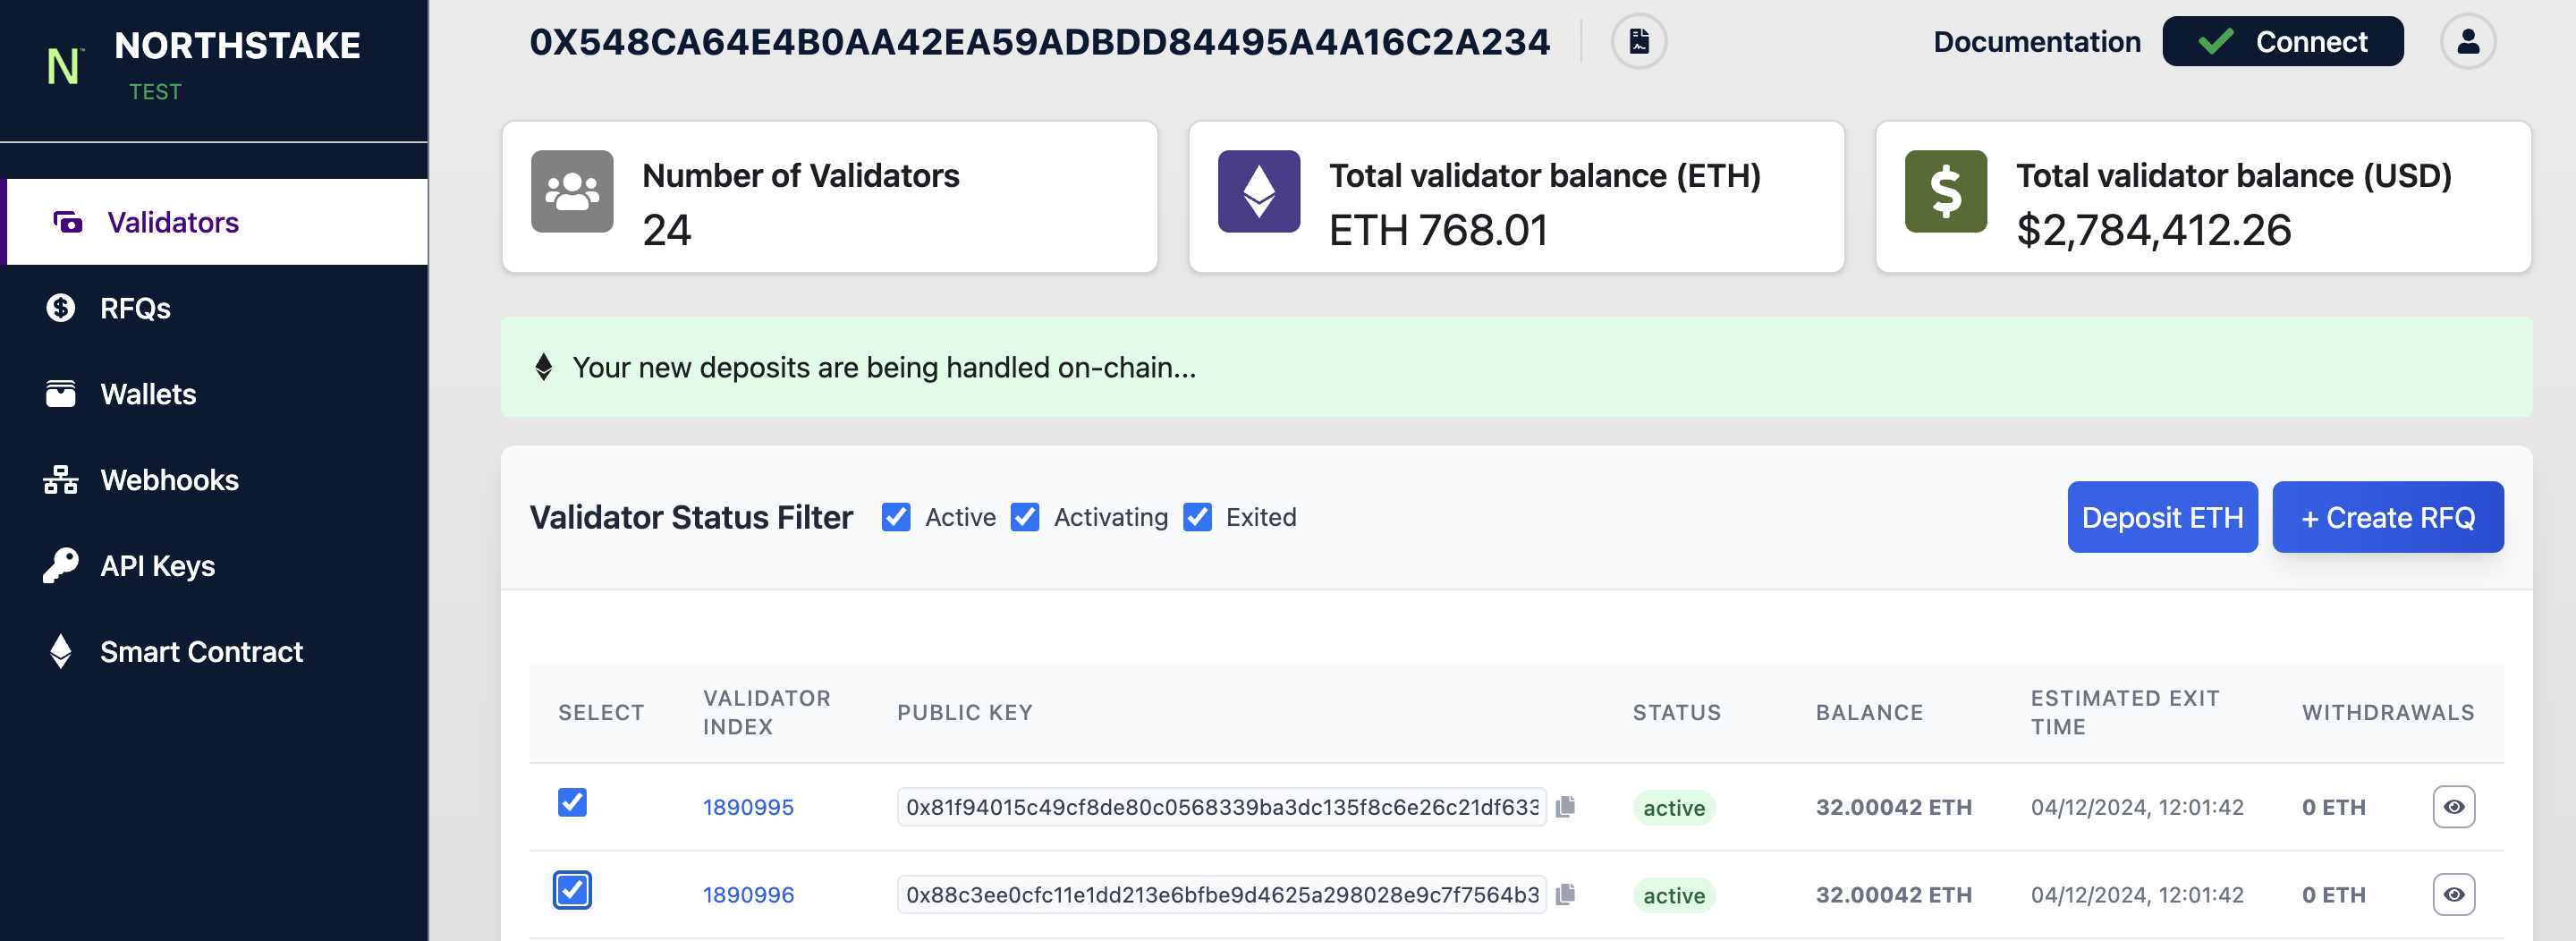
The first step to submit an RFQ is to list the current validators owned by the depositor (or seller). The list of validators will provide you with the following info for each validator:
- Validator index: The index of the validator
- Balance: Total balance on Beacon Chain
- Estimated exit time: The estimated time for the validator to exit the Beacon Chain in case of a withdrawal
Using the information above, depositors / sellers can request a quote for a single or multiple validators up. When creating an RFQusers need to specify the validator/s they wish to sell by providing the validator index/indices.
In addition, the seller needs to supply the Ethereum wallet address where they wish to receive the liquid ETH if a quote is accepted and a sale is settled.
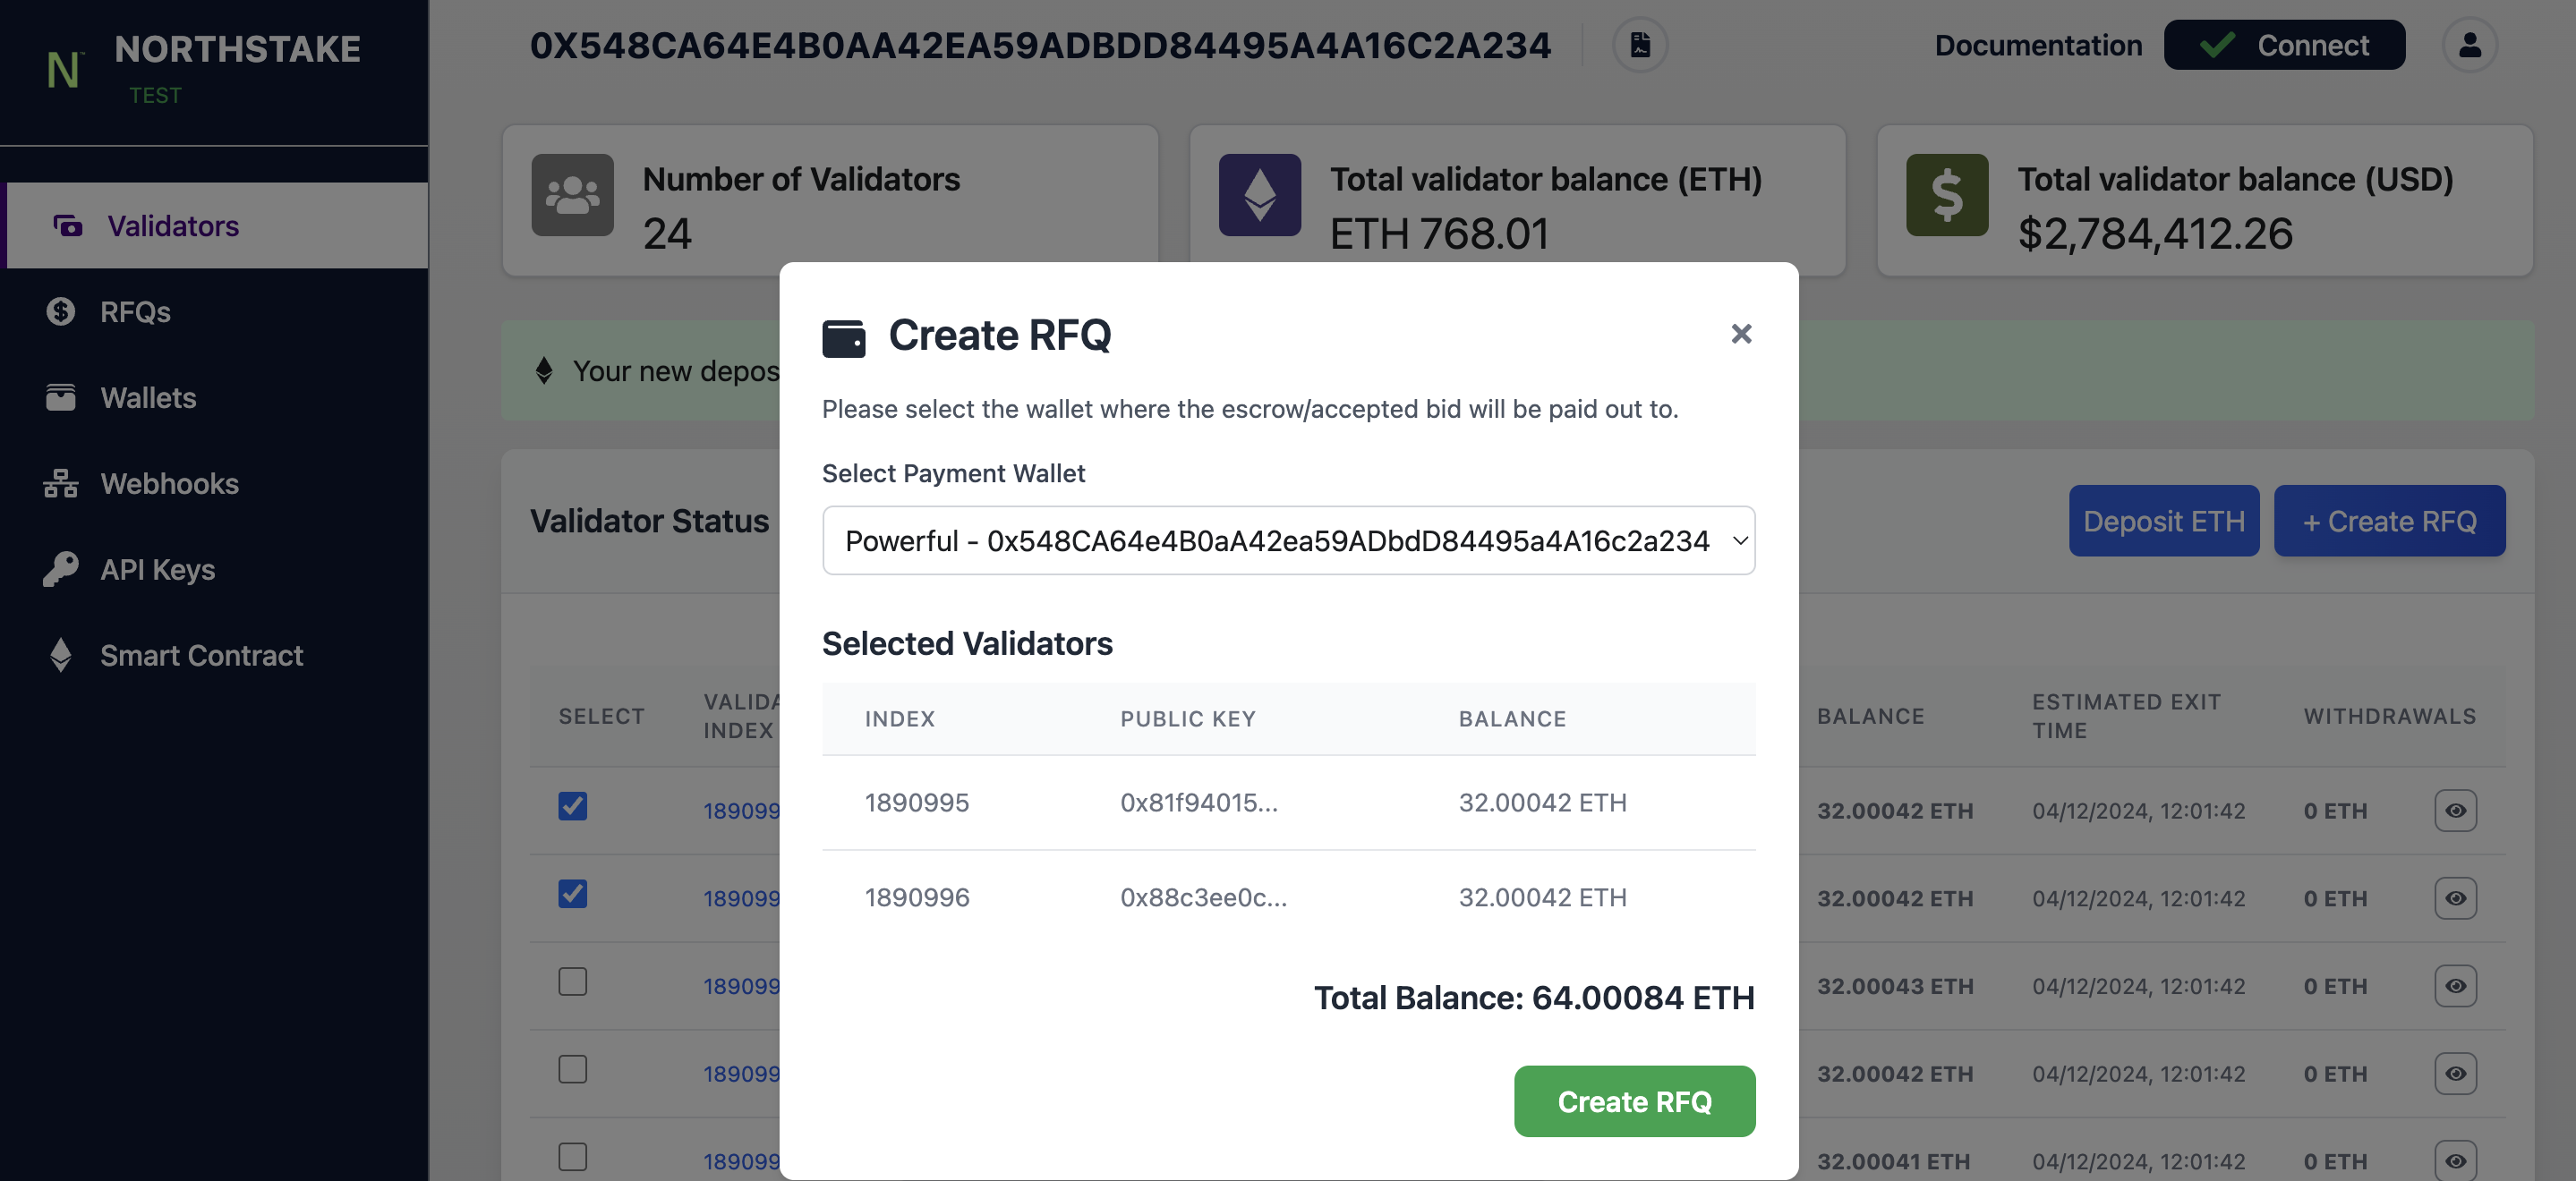
It is possible to create multiple RFQs. However, it is not possible to include the same validator in multiple concurrent (active) RFQs
4. Accepting or rejecting quotes
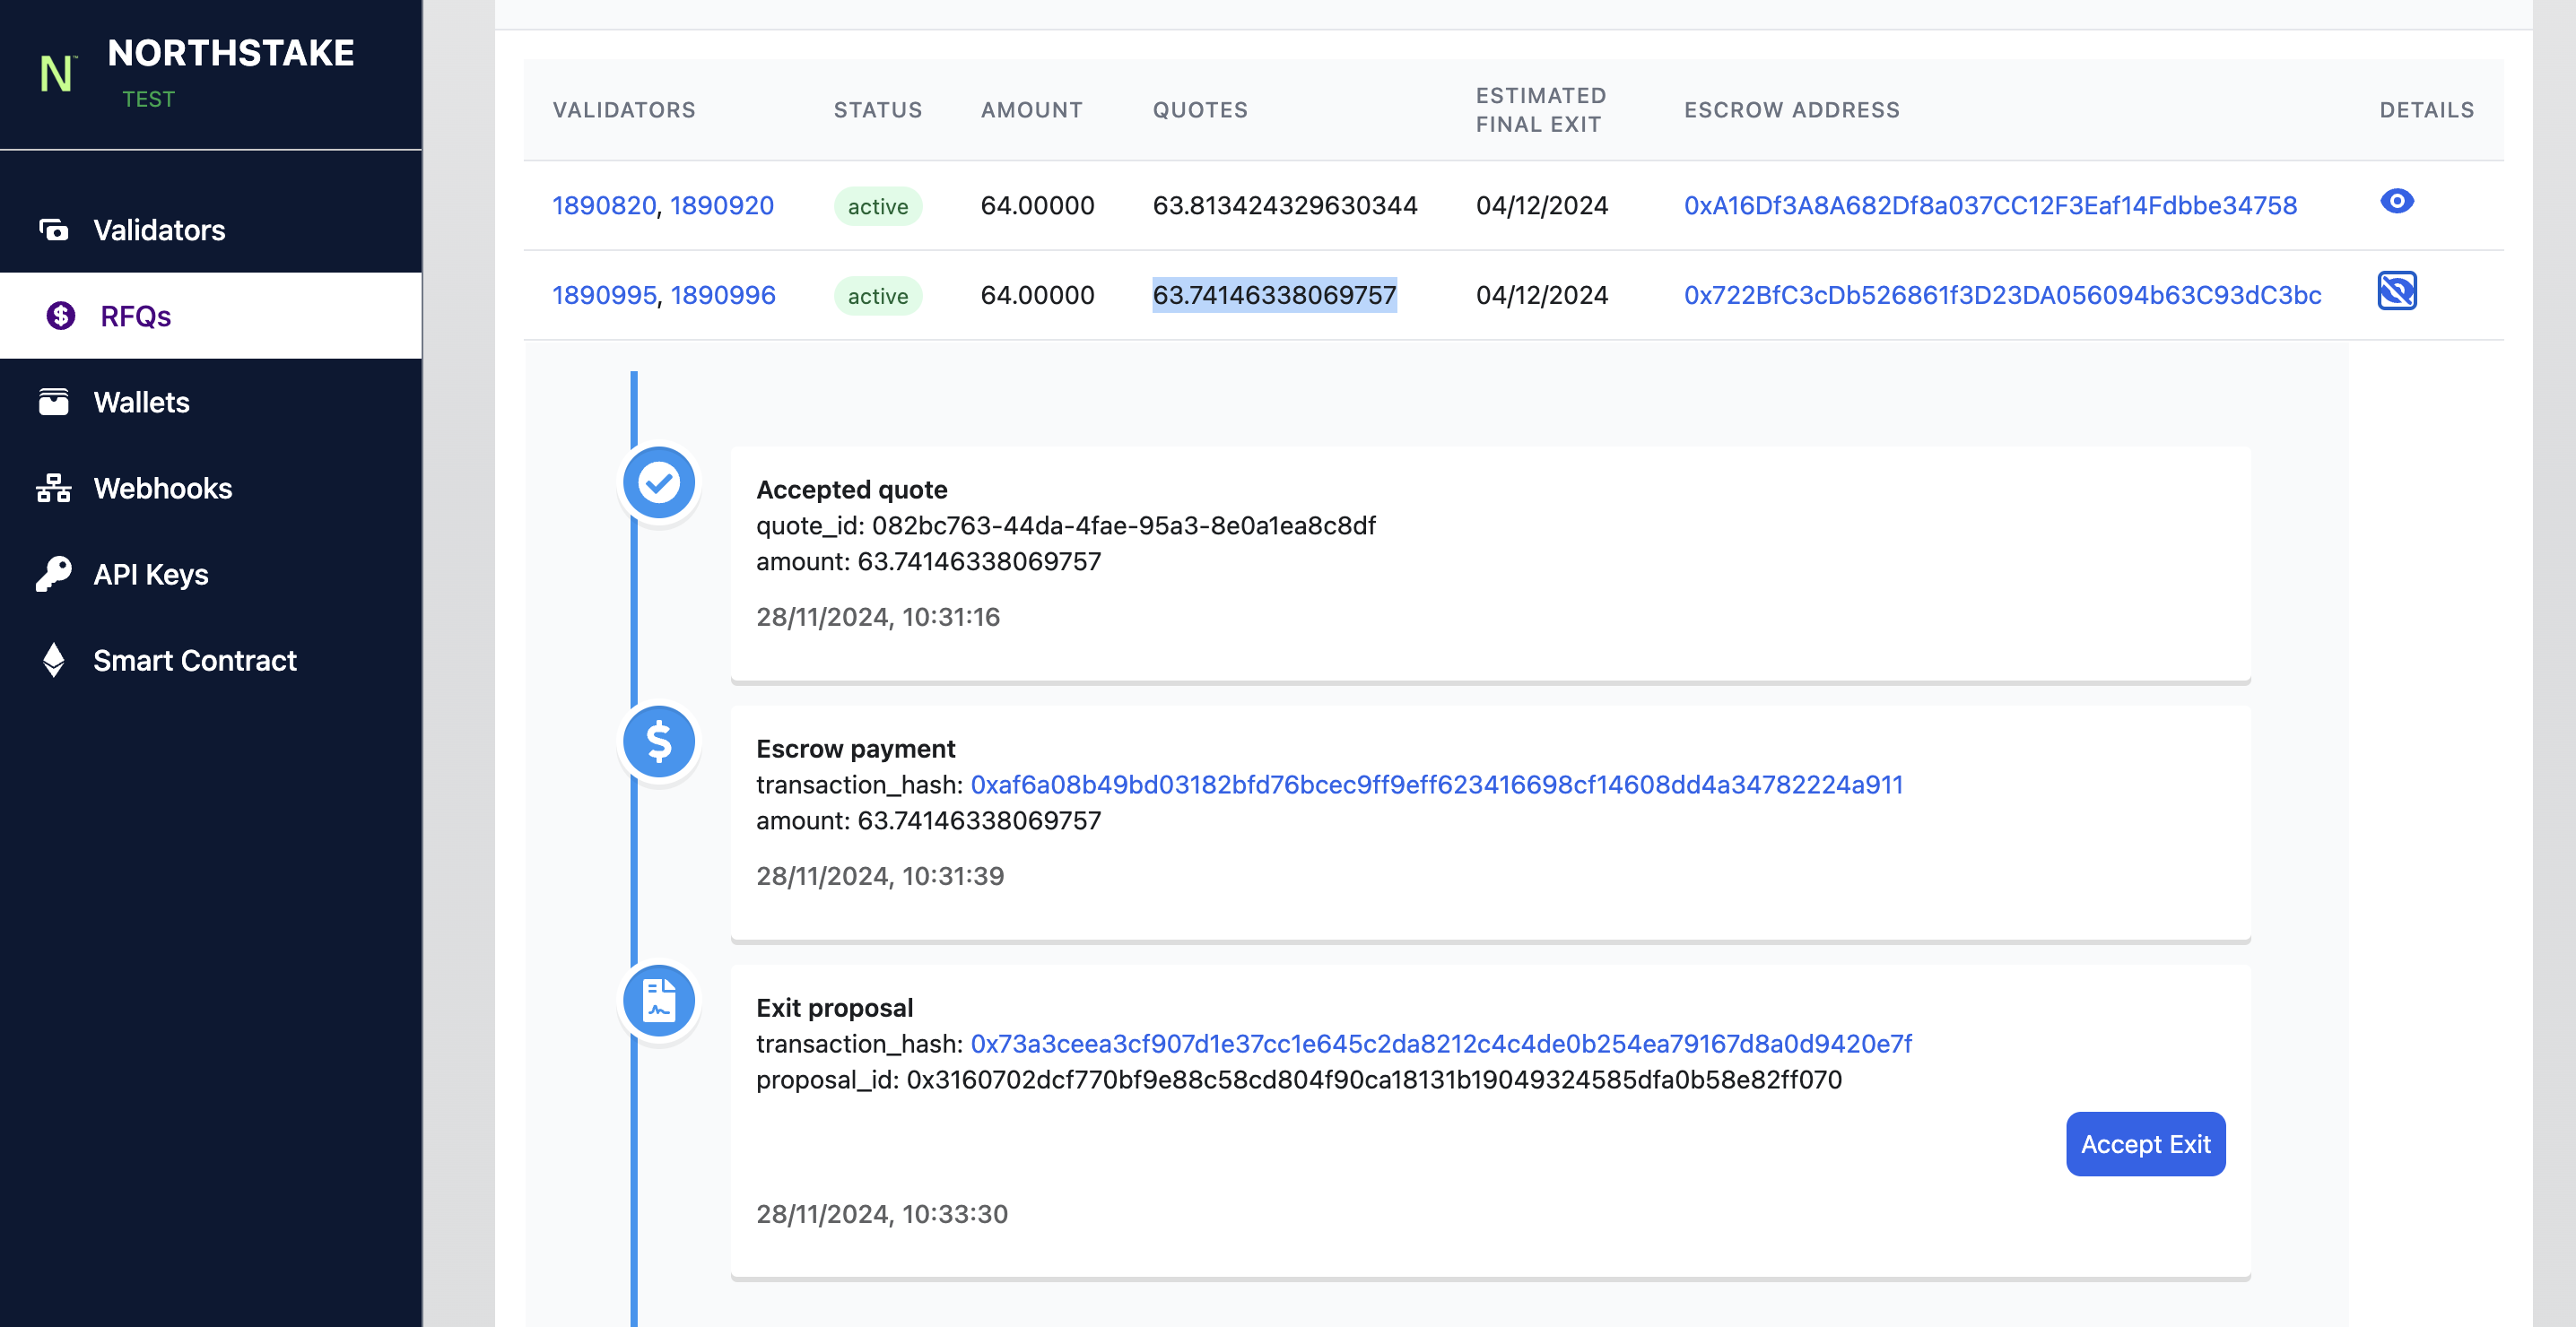
Once the RFQ is created, liquidity providers submit bids in response to the RFQ. Bids are denominated in ETH.
Depositors (sellers) can see active bids on the RFQ tab. More detailed information can also be found via the webhook RFQBidReceived. The webhook shows the following information for each bid:
- RFQ ID: ID of the RFQ
- Quote_ID: ID of the Quote
- Amount: Amount offered, denominated in ETH
- Timestamp of quote:
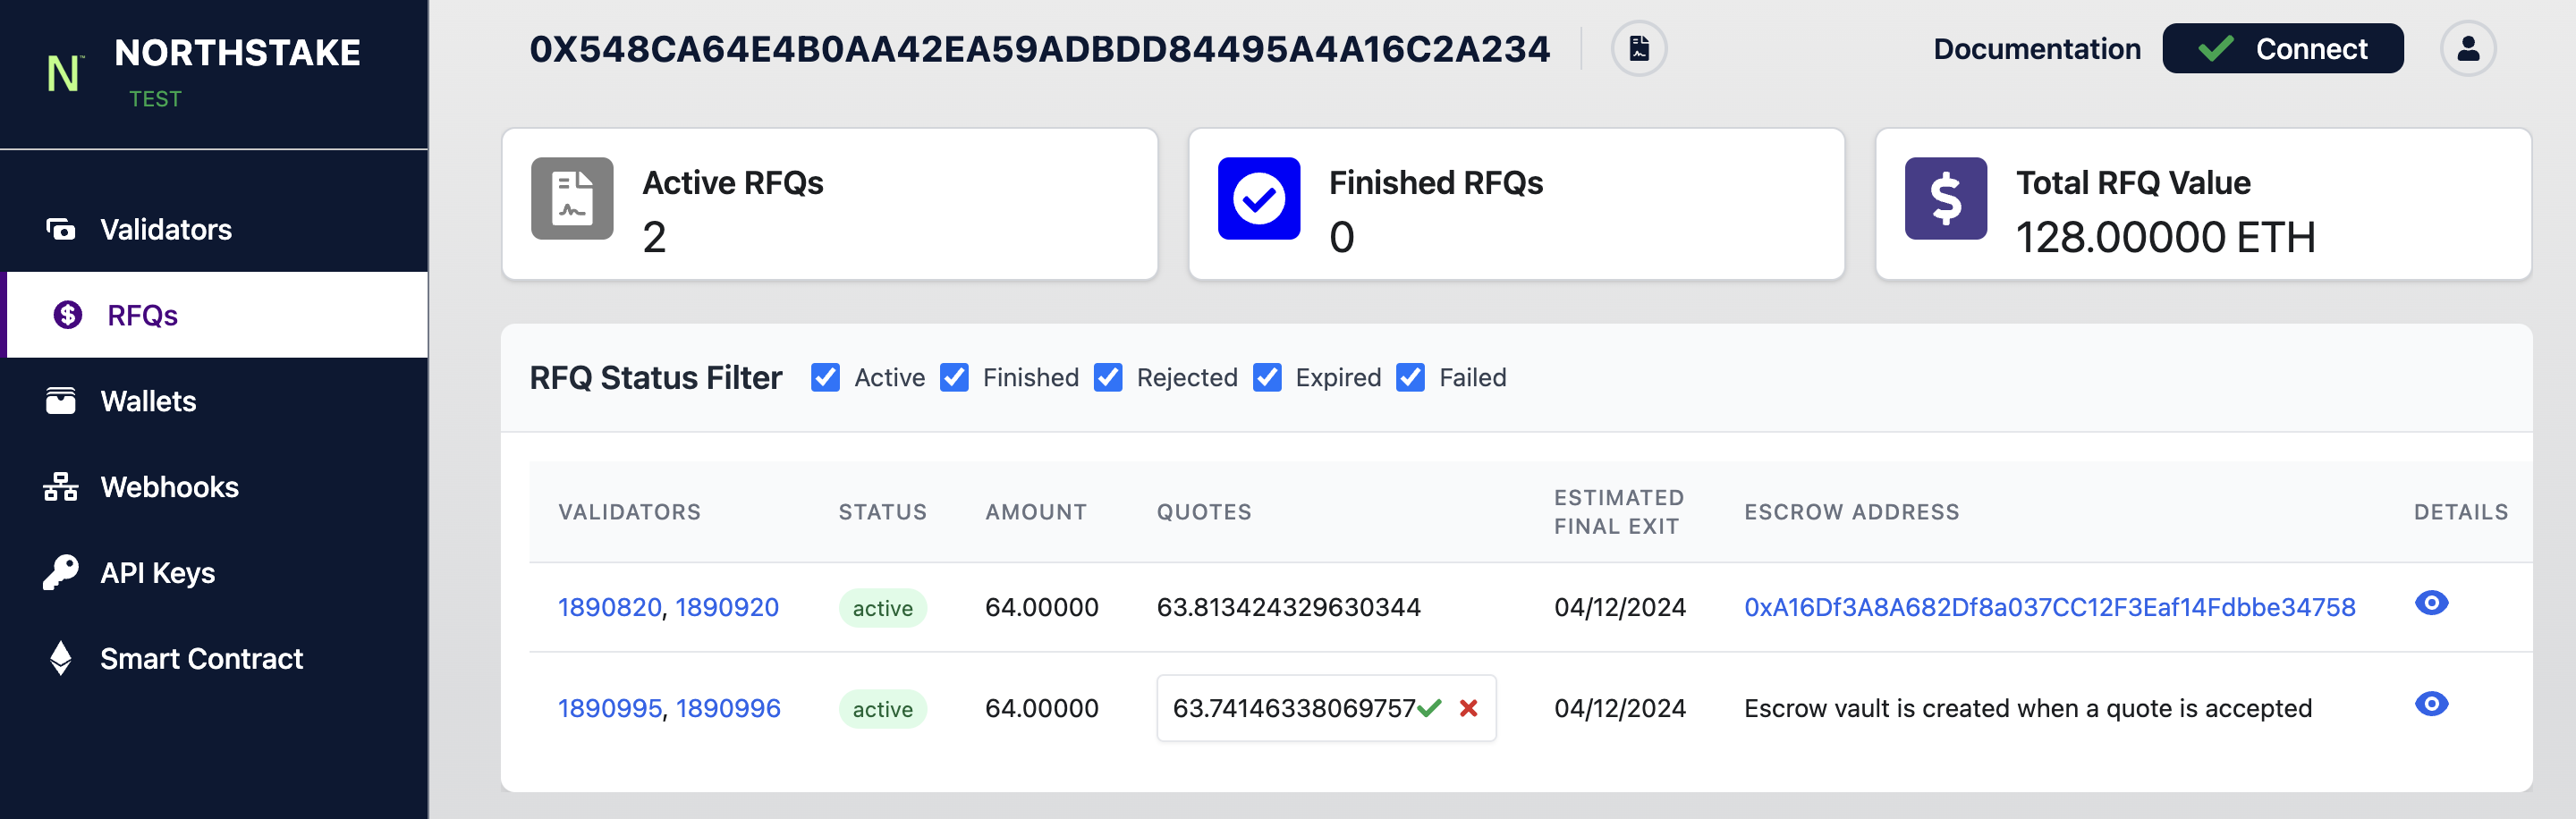
If a quote meets the requirements of the depositor, they can choose to Accept the Quote. All quotes are presented for each active RFQ. Sellers can choose to accept any of the quotes provided.
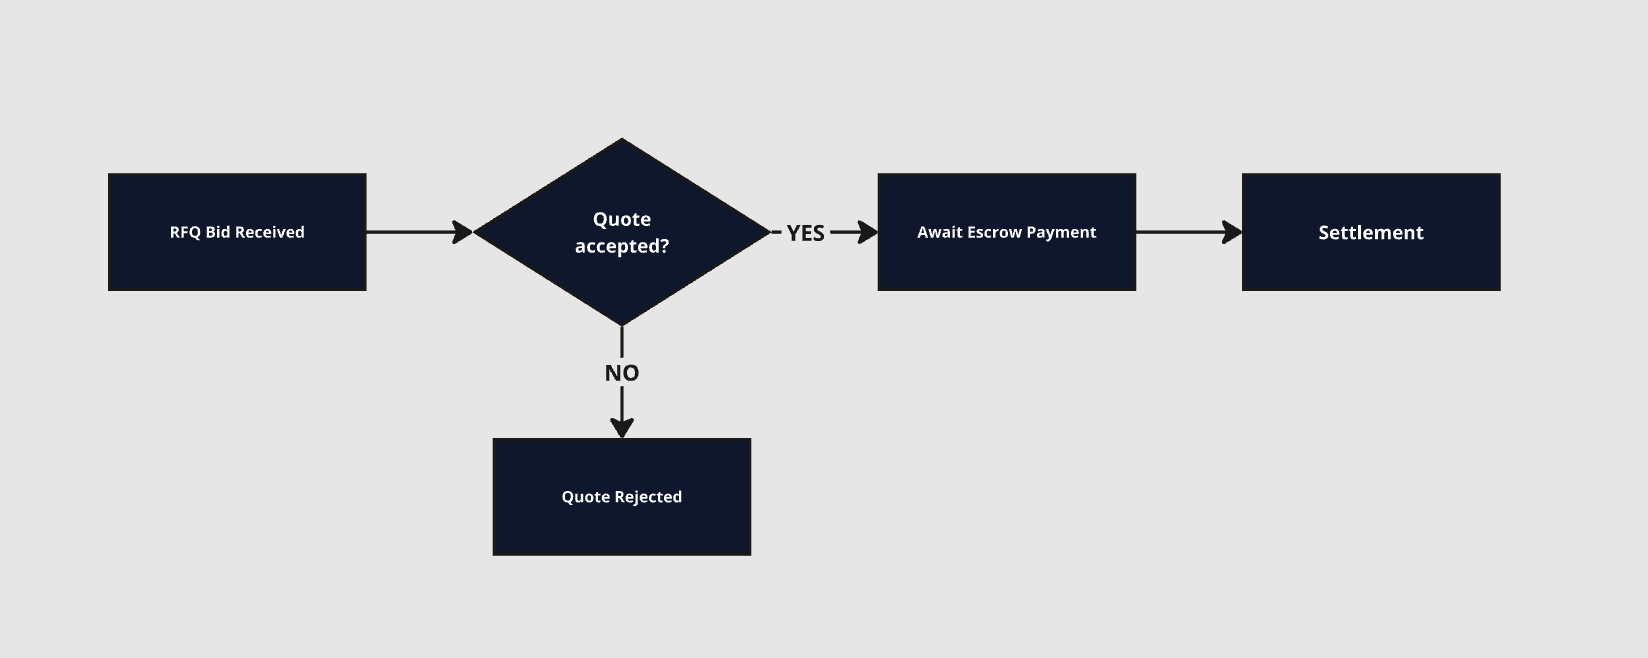
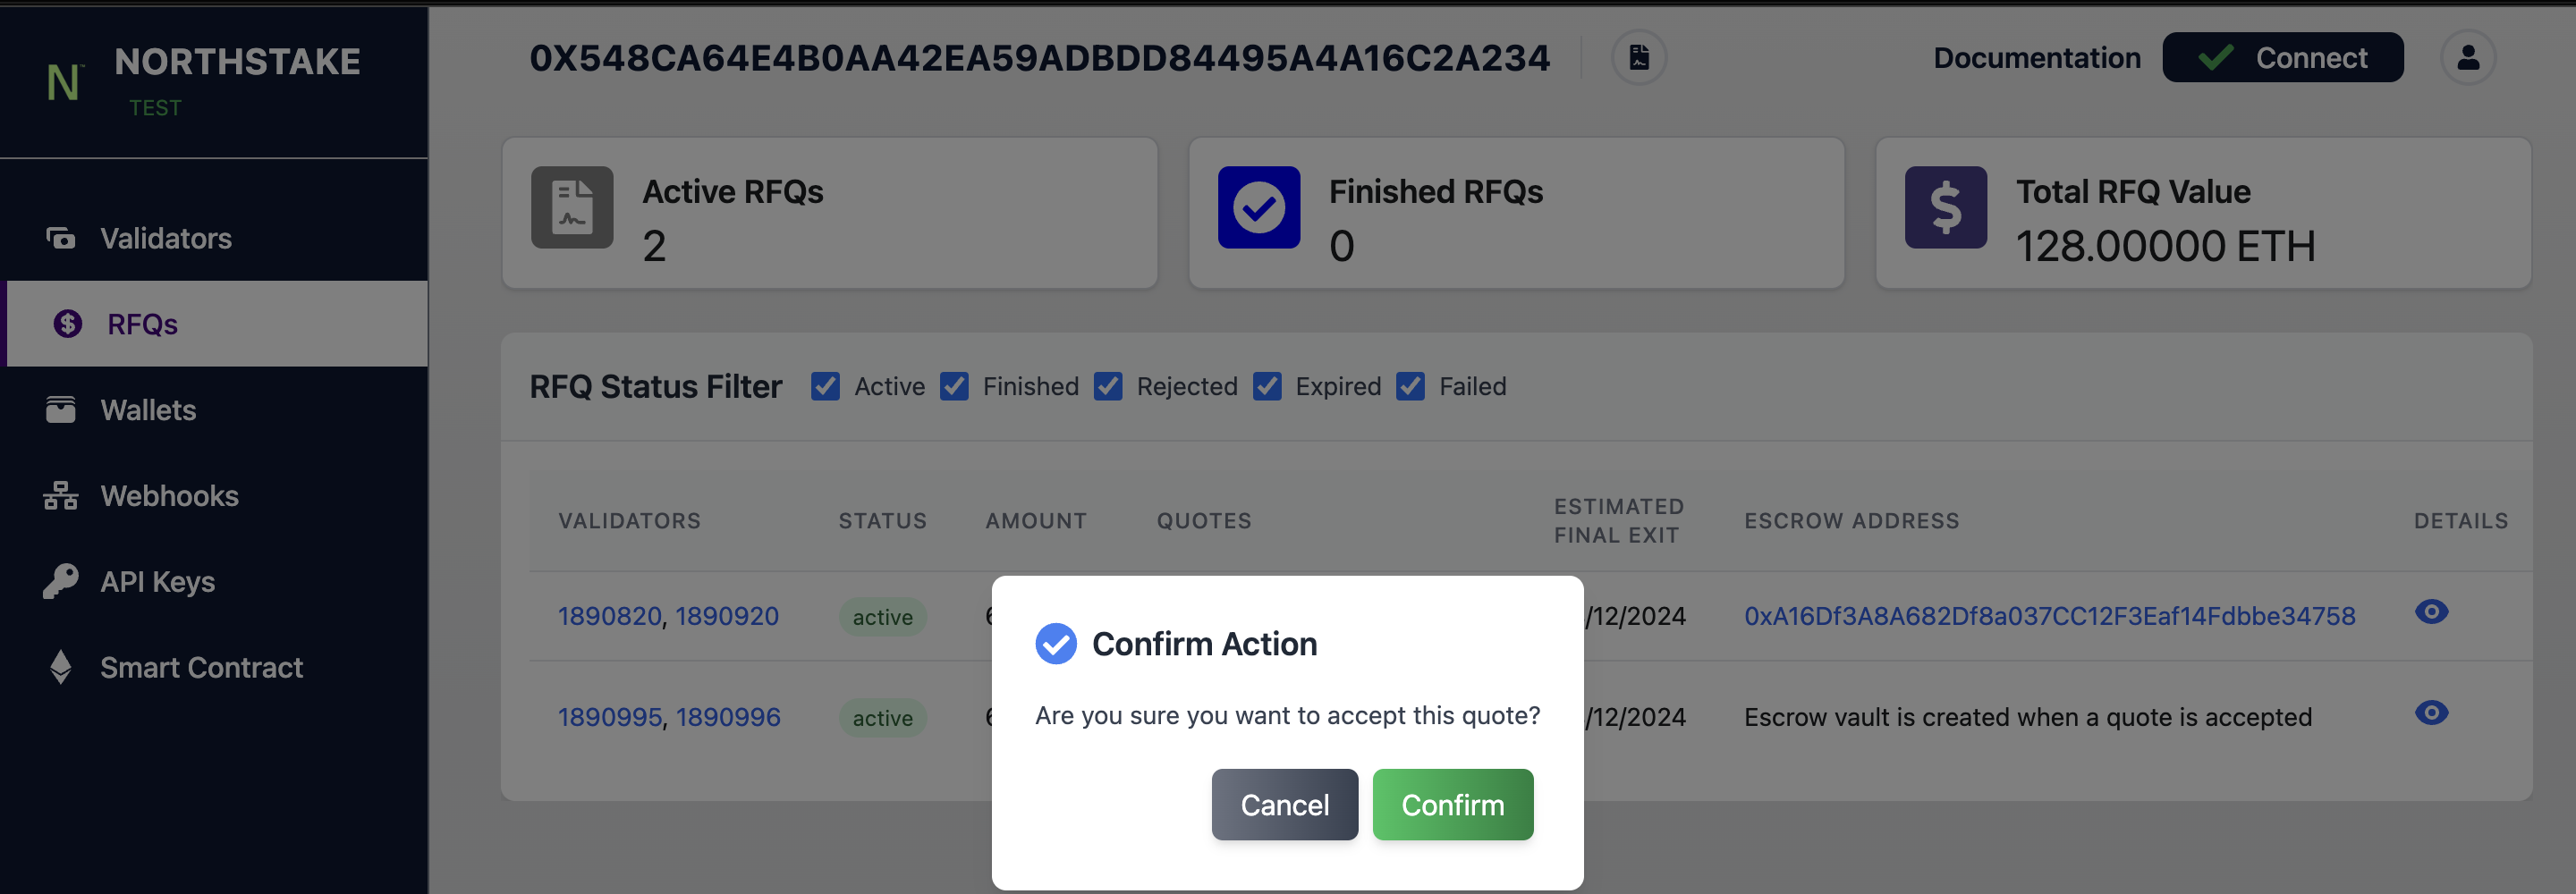
Once a quote has been accepted, the buyer and seller proceed to settle the trade. Note that both providing and accepting quotes are binding commitments.
Settlement
Buyers settle first and sellers await for the liquidity provider to transfer the bid amount of ETH to the escrow wallet. Once the ETH balance in the escrow wallet equals the ETH amount submitted in the quote, the webhook RFQEscrowEvent is triggered. The webhook shows the following:
- RFQ ID: ID of the RFQ
- Timestamp: Time of transaction
- Transaction hash: transaction hash of the ETH transferred by the LP
- Amount: Amount transferred, denominated in ETH
You can always track the process of any RFQ by clicking the Eyeicon on the right.

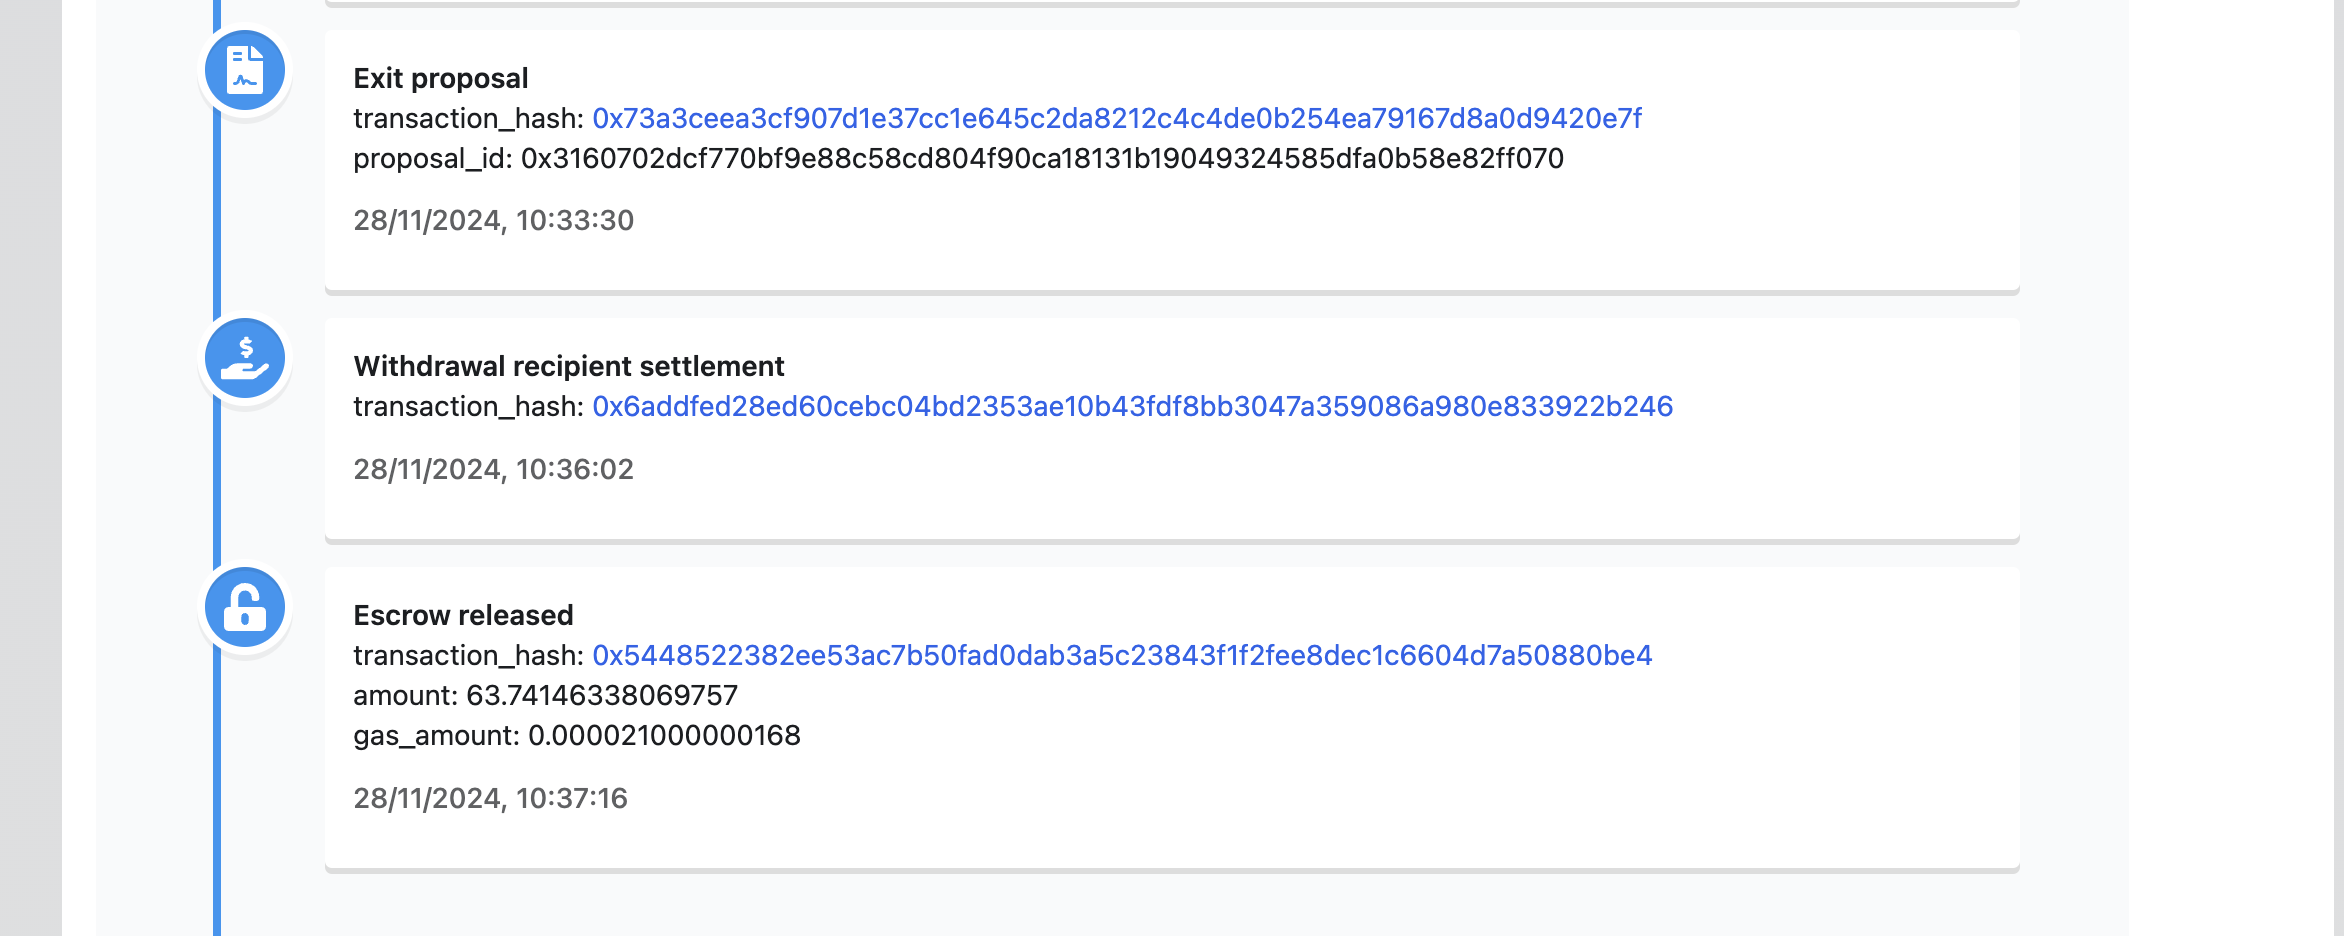
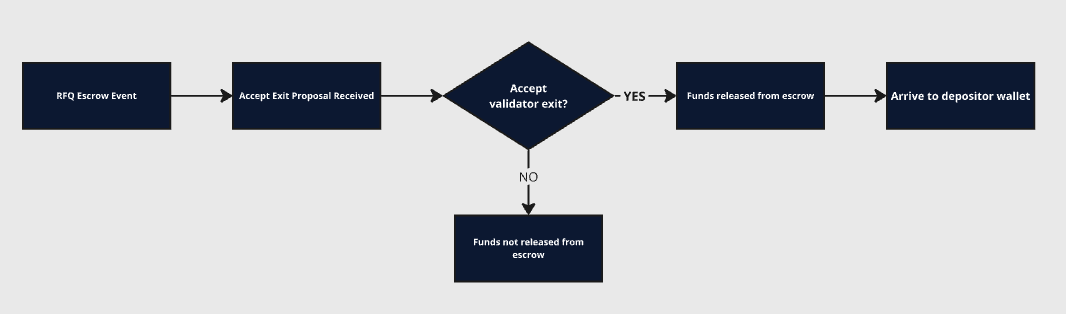
5. Confirm validator exit
Once the escrow wallet is funded, Northstake creates and signs an Exit Proposal transaction for the depositor’s acceptance. Since Northstake does not have custodial rights over the funds in the smart contract, it can only propose validator exits, while Depositors must accept exits to initiate their withdrawal from the Beacon Chain.
Once the Exit Proposal transaction is broadcasted, sellers receive a message via the webhook called: RFQTransferProposalReceived which contains the following:
- Timestamp: Time of transaction
- Transaction hash: hash of the exit proposal
- Proposal id: unique identifier of the proposal.
To accept the exit proposal, click acceptExit button in the UI and confirm the transaction with your wallet.
Once the exit proposal is accepted by the depositor, the funds in the escrow wallet will be transferred to the wallet chosen by the depositor/seller when the RFQ was initially created. The depositor will also be notified of escrow releases via the webhook RFQEscrowReleased which contains the following:
- Timestamp Time of transaction
- Transaction hash: hash of the escrow wallet transfer to the depositor wallet
- Amount: ETH amount
- Gas cost: Gas cost of performing the transaction.
The release of escrow is also shown in the UI
Below is a small flowchart depicting the escrow flow
Updated 2 months ago